Google Workspace to Office 365 Migration Tool
4.7
The Cigati Google Workspace to Microsoft 365 Migration Tool is designed to move email data from one Google Workspace environment to another. It allows administrators to configure source and target mailboxes, map users, set migration filters, monitor ongoing transfers, and examine task reports. The tool also supports secure account authentication and helps retain important mailbox information during the transfer. Please refer to the Functional & Technical Documentation (FTD) Guide for detailed instructions.
Open the Tool and Choose Mailbox Migration
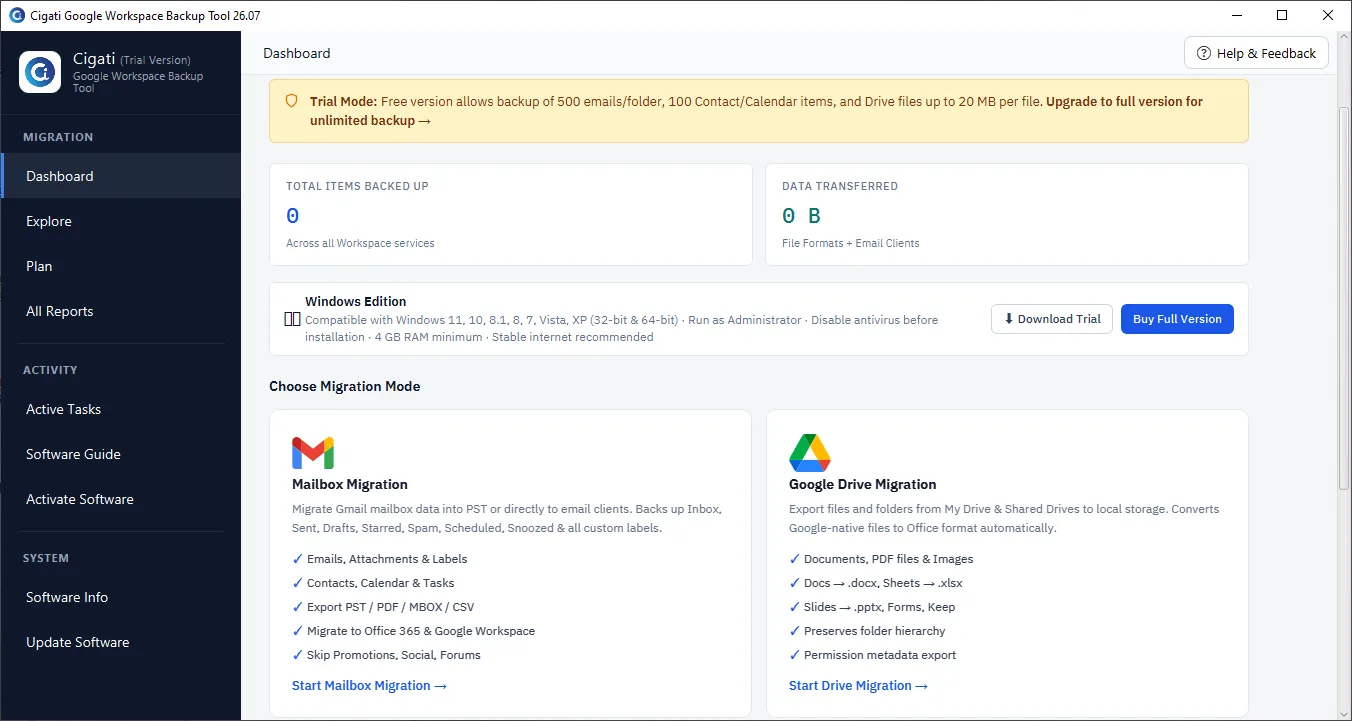
Launch the software and go to the main dashboard. Select Mailbox Migration to transfer Gmail emails along with contacts, calendars, tasks, and labels.
Set Up the Source Google Workspace Account
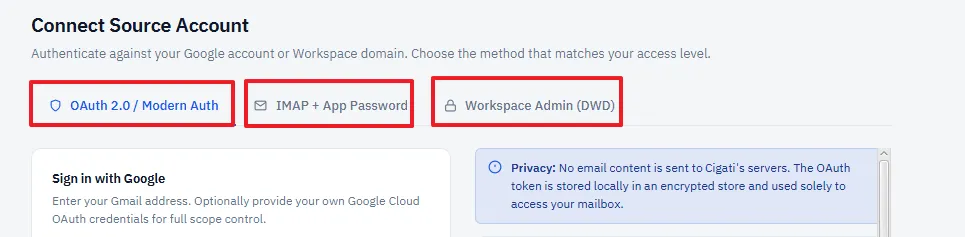
multiple authentication methods, including OAuth 2.0 (Modern Authentication), IMAP with App Password, and Google Workspace Admin (DWD).
Complete Google Authentication
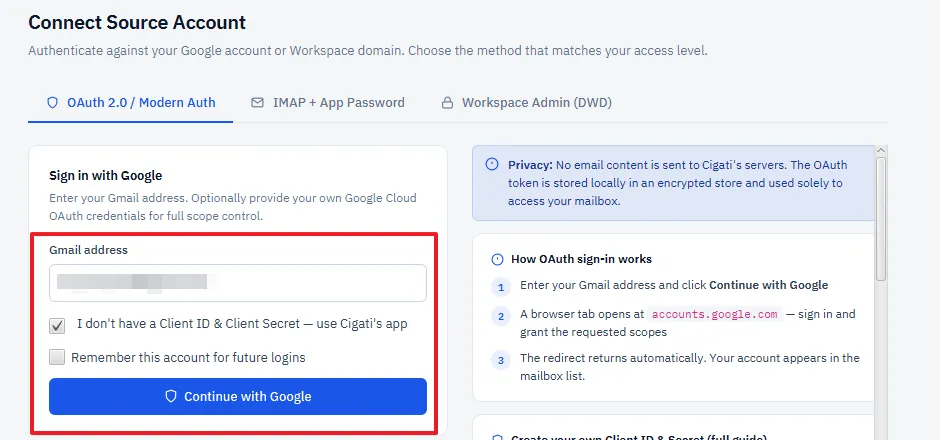
Sign in to the source Google account and provide the permissions requested by the application. This allows the tool to access the selected Google Workspace mailbox data.
Pick the Source Mailboxes
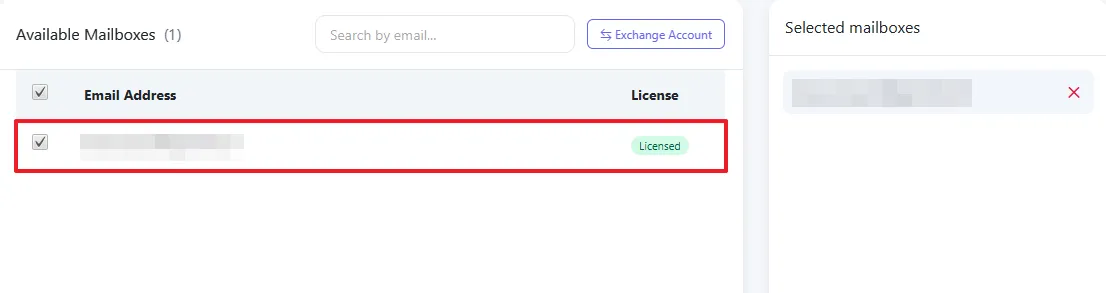
The available Google Workspace mailboxes will appear after authentication. Select one or multiple mailboxes for migration. You can use the search feature to locate specific mailboxes quickly, then click Continue.
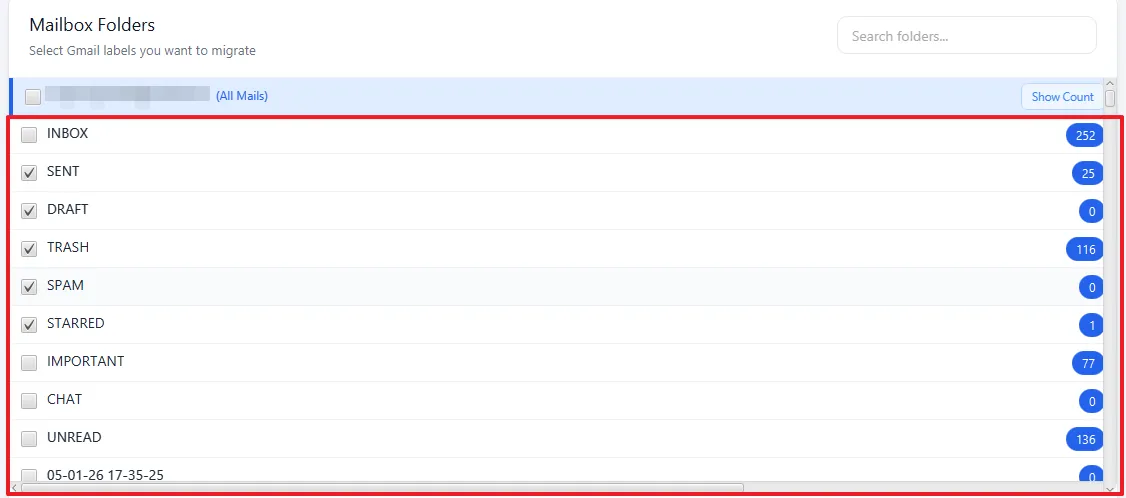
Choose Gmail Folders and Labels
Select the Gmail folders or labels that should be included in the migration. If needed, click Show Count to check the number of emails available in each selected folder. Click Continue to proceed.
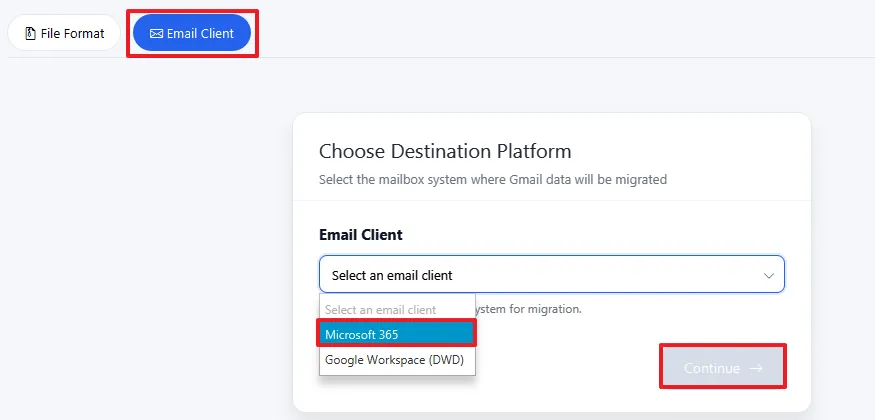
Set Microsoft 365 as the Destination
From the list of supported destination platforms, select Microsoft 365 and click Continue.
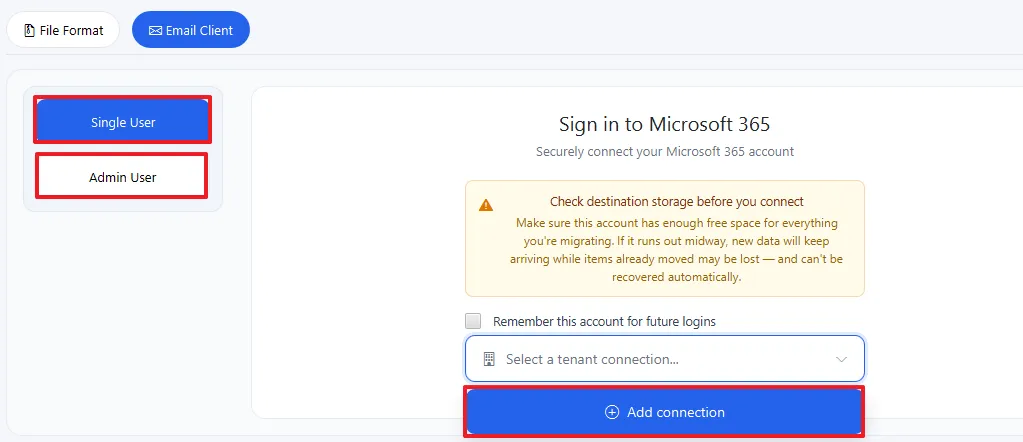
Authenticate the Microsoft 365 Environment
Choose either Single User or Admin User mode based on your migration requirements. You can connect the Microsoft 365 account through Modern Authentication or by providing the Client ID, Client Secret, and Tenant ID.
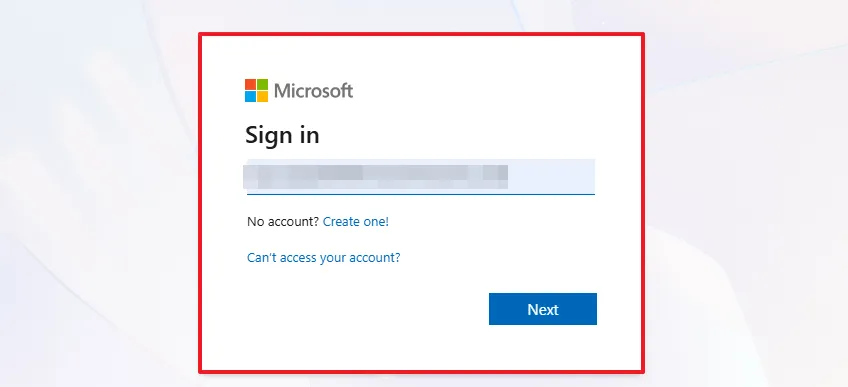
Enter Microsoft 365 Account Details
Provide the valid credentials or required authentication details for the Microsoft 365 destination account and complete the sign-in process.
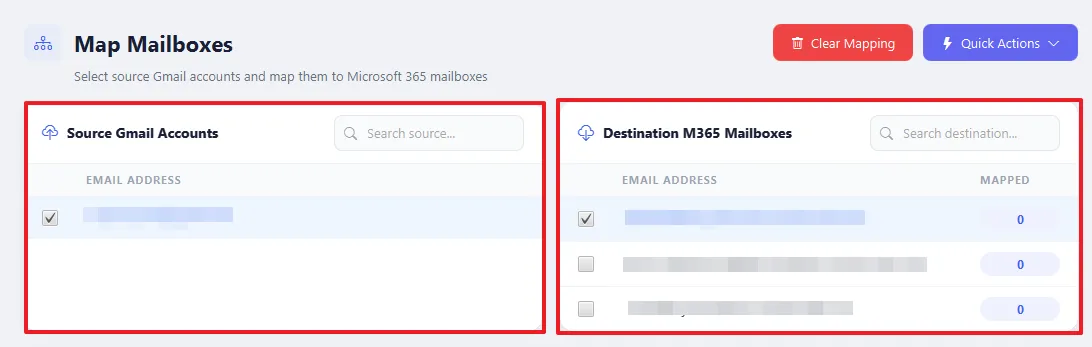
Match Source and Target Mailboxes
Create a mailbox mapping between the Google Workspace source accounts and their corresponding Microsoft 365 destination accounts. Check each mapping carefully before continuing.
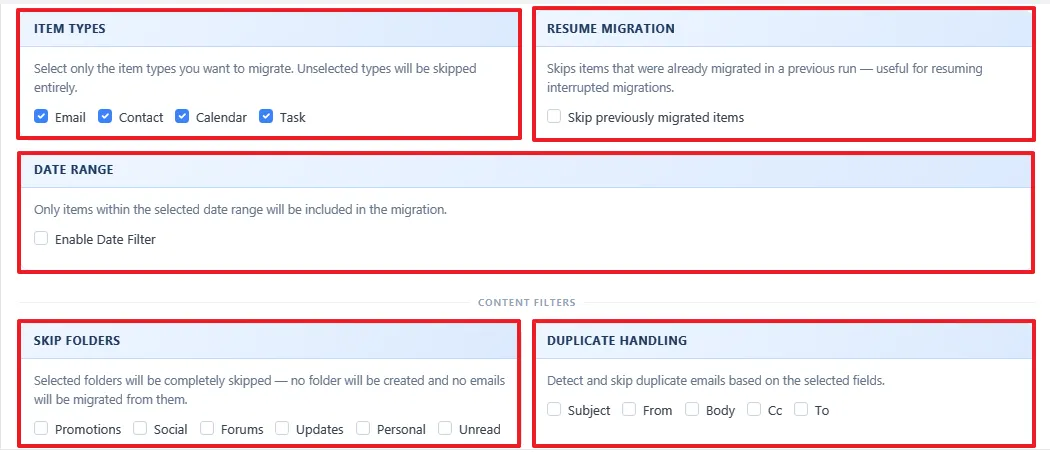
Select Data and Migration Filters
Choose the mailbox components you want to transfer, including Emails, Contacts, Calendars, and Tasks. You can narrow the migration by applying a Date Range or enable Resume Migration to continue an interrupted task without starting over.
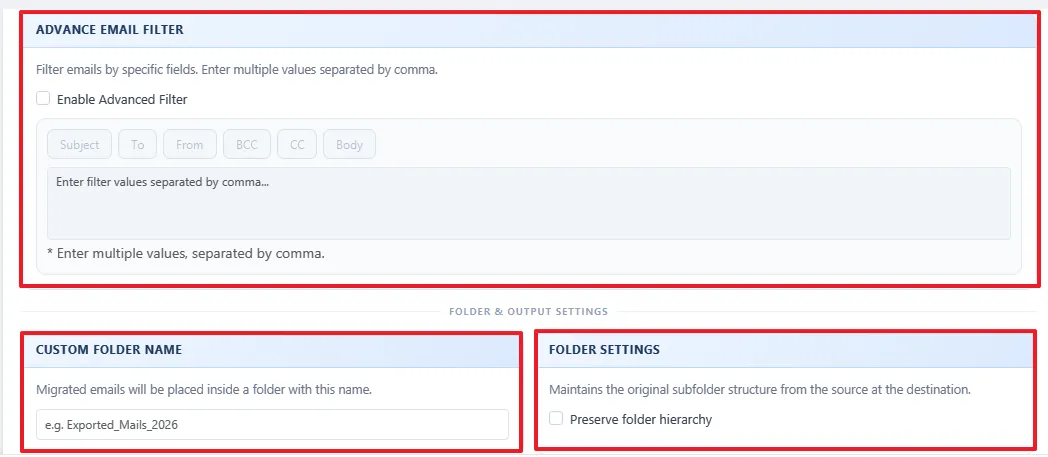
Set Advanced Migration Preferences
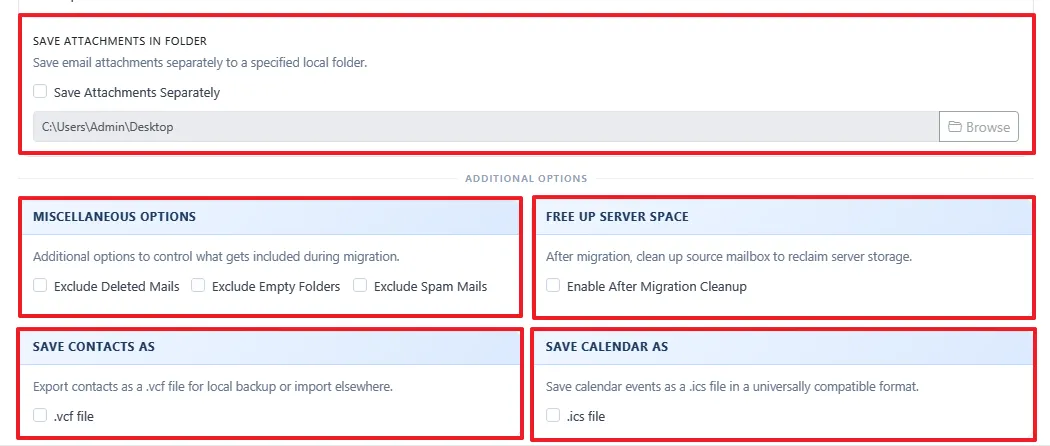
Configure additional options according to your requirements. These may include skipping duplicate emails, excluding selected folders, maintaining the existing folder hierarchy, omitting attachments, or saving attachments separately.
Configure Other Migration Options
Use the additional settings to exclude deleted, spam, or empty folders from the transfer. The tool also provides options to export contacts in VCF format, calendars in ICS format, or release server storage after the migration.
Begin the Migration
Review the selected accounts, mailbox items, filters, and other settings. Once everything is configured, click Start Migration to transfer the selected Google Workspace data to Microsoft 365.

Check the Migration Summary
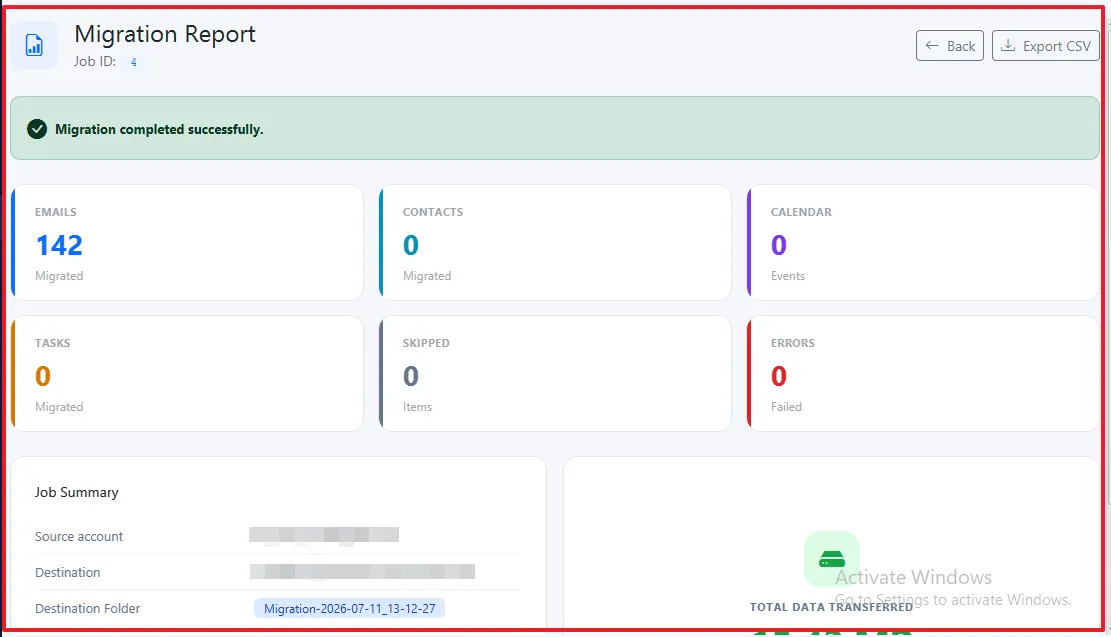
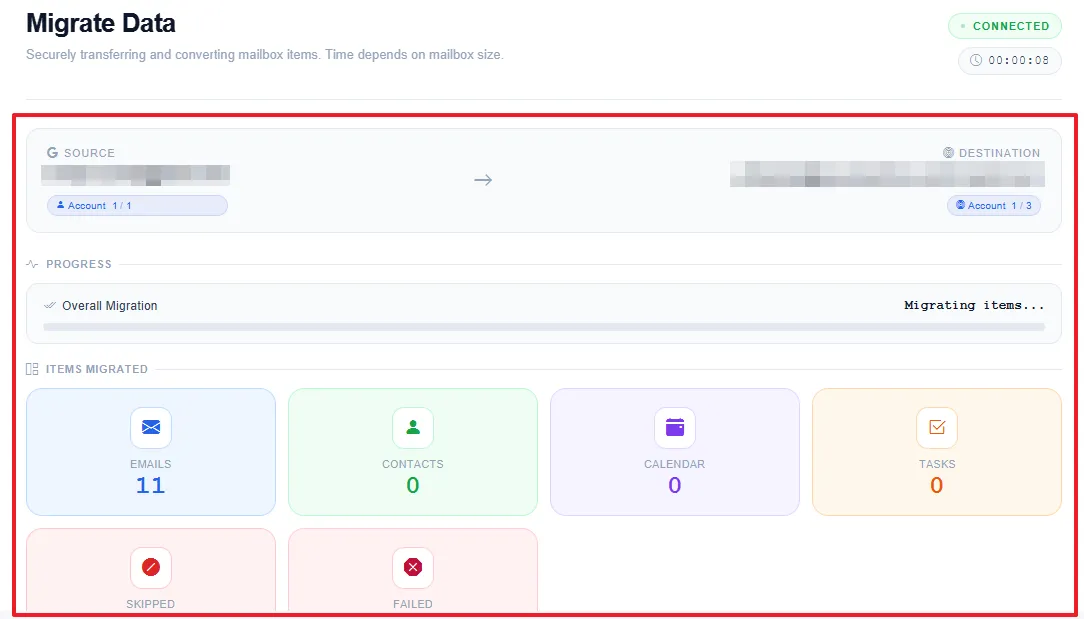
When the migration is finished, open the report to check the overall status and results. Review details such as the number of migrated items, skipped and failed items, transferred data size, migration duration, and destination mailbox information.
Examine Detailed Migration Logs
For a more detailed review, open Active Tasks or All Reports. These sections provide access to migration logs and help you identify successful transfers, skipped data, errors, and other task-related details.