Modern Authentication Guide for All Cigati Products when the User is Using Office 365 either in Source or in Destination.
Once You choose the Modern Authentication option for Office 365 Authentication, You have to Enter your Office 365 User Account ID in the Login section
Step 1: Select the Office 365 Module (Source/Destination), and Choose the Modern Authentication feature to login.
Step 2: Once you fill in the Office 365 Login ID and click on the Sign In button, the software will redirect to the Default Browser.
Step 3: When the Browser opens, authenticate with your specific Office 365 Account ID. 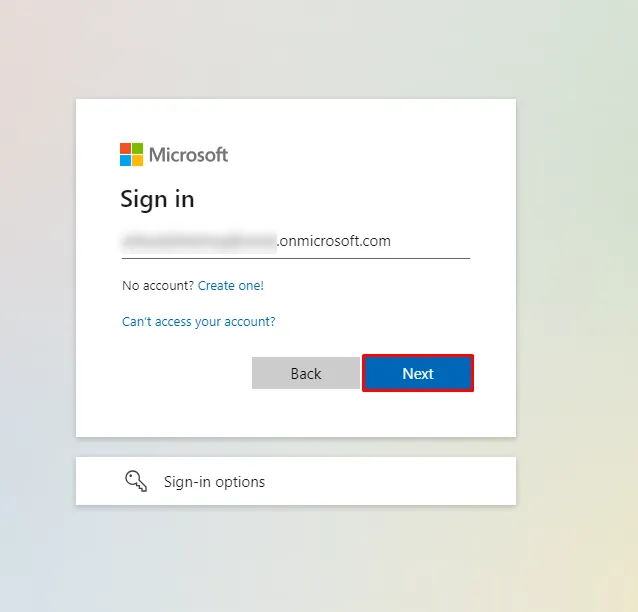
Step 4: Then Enter your Office 365 Password to Authenticate the Login Process.
Step 5: If you are using Office 365 either in Source or in Destination in any Cigati’s Software then you will have to Grant Permission, Check the Consent on Behalf of your Organization checkbox and Accept the conditions. 
Step 6:The above Permission is Mandatory if you are using Cigati Products for Logging into Office 365.
Step 7:Go back to the software, you will be good to go after the authentication process has been successfully completed.
Modern Authentication Guide for Cigati Products with Gmail
Modern Authentication Guide for All Cigati Products when the User is Using Gmail either in Source or in Destination.
Once You choose the Modern Authentication option for Gmail Authentication, You have to Enter your Gmail User Account ID in the Login section
Step 1: Select the Gmail Module (Source/Destination), and Choose the Modern Authentication feature to Login.
Step 2: Once you fill in the Gmail Login ID and click on the Sign In button, the software will redirect to the Default Browser. 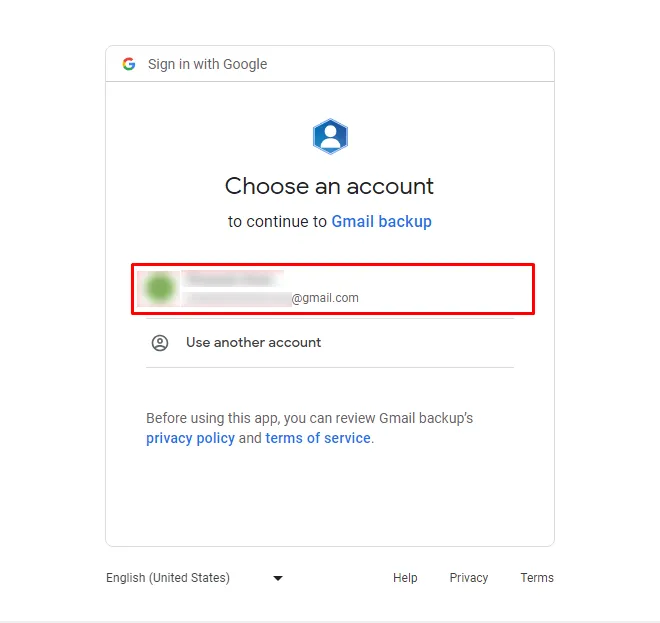
Step 3: Then Enter your Gmail ID and Password to Authenticate the Login Process.
Step 4: Or else choose the specific Gmail Account that is already Logged In.
Step 5: If you are using Gmail either in Source or in Destination in any Cigati’s Software then you will have to Grant Permission, mark the “Select All” checkbox and click on the Continue button.
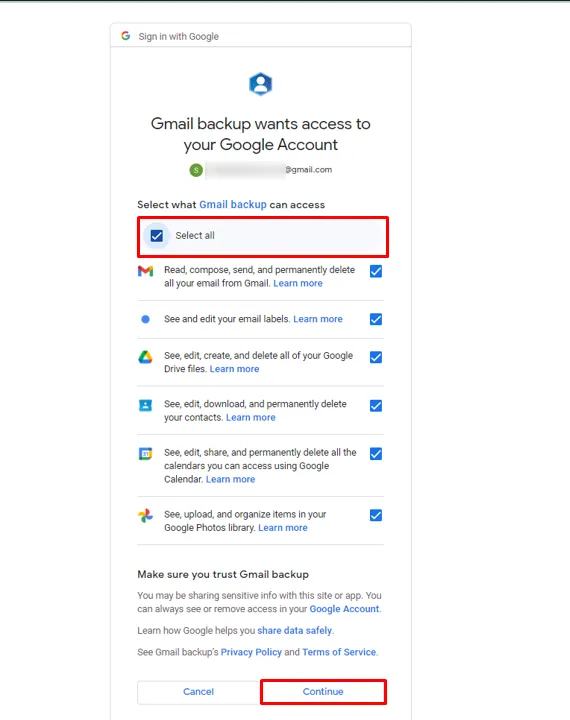
Step 6: The above Permission is Mandatory if you are using Cigati Products for Logging into Gmail.
Step 7: Go back to the software, you will be good to go after the authentication process has been successfully completed.