VDI Recovery Tool
4.7
A user-friendly application with an intuitive design for beginners to navigate effortlessly.
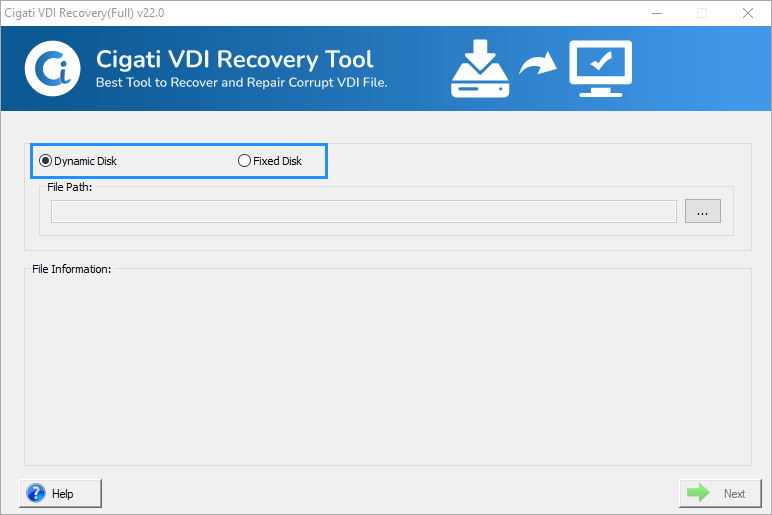
Install and Run the Cigati VDI Recovery Software and select the Disk type (Fixed Disk & Dynamic Disk).
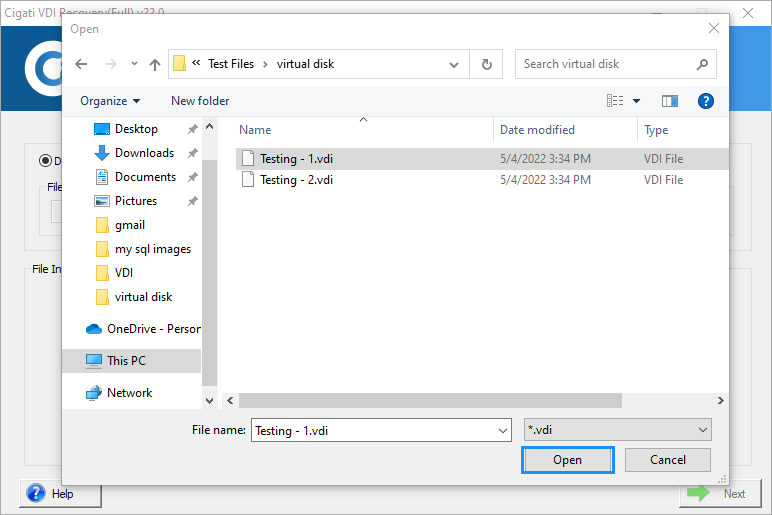
Click on the Browse icon to choose the corrupt VDI file and tap on the Open button.
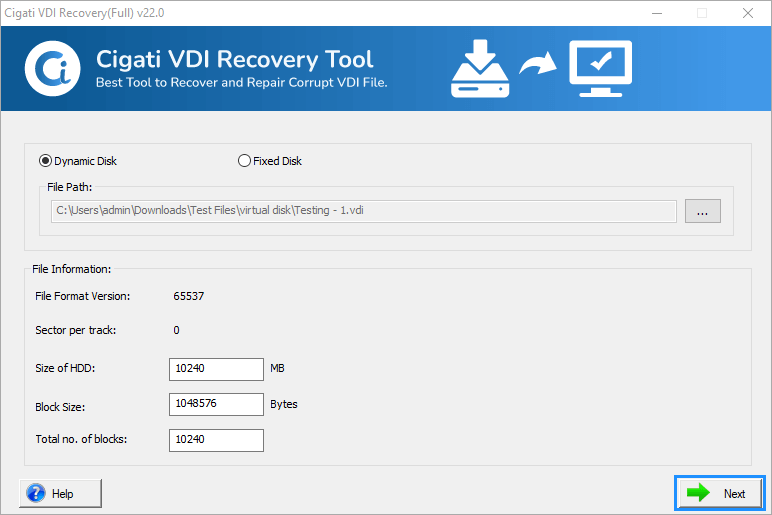
Here you can view the File Information and then click on the Next button.
Click on the Save Disk Images to save the images in the disk.
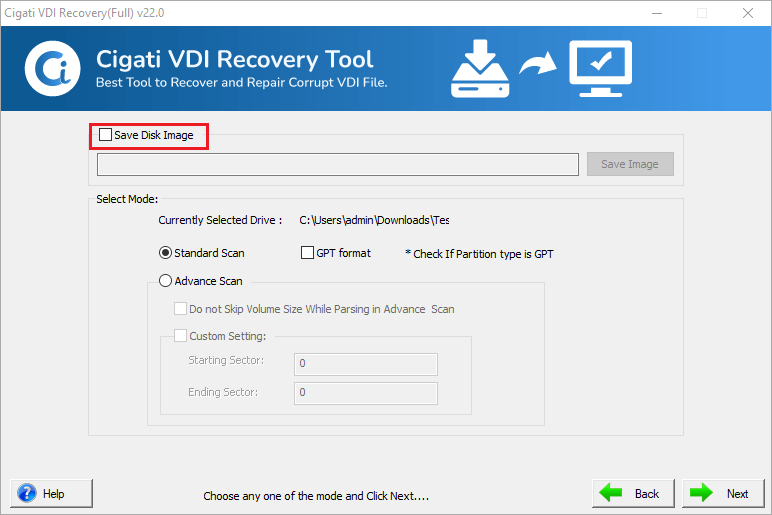
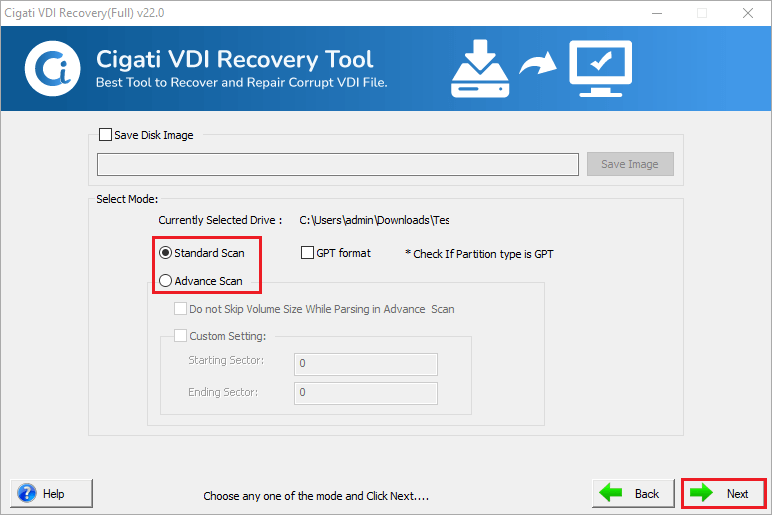
Now, select the Scanning Mode (Standard & Advanced) and other features of the tool as per your choice and hit the Next button. (Note: You can also opt for the GPT option to specify the GUID partition table)
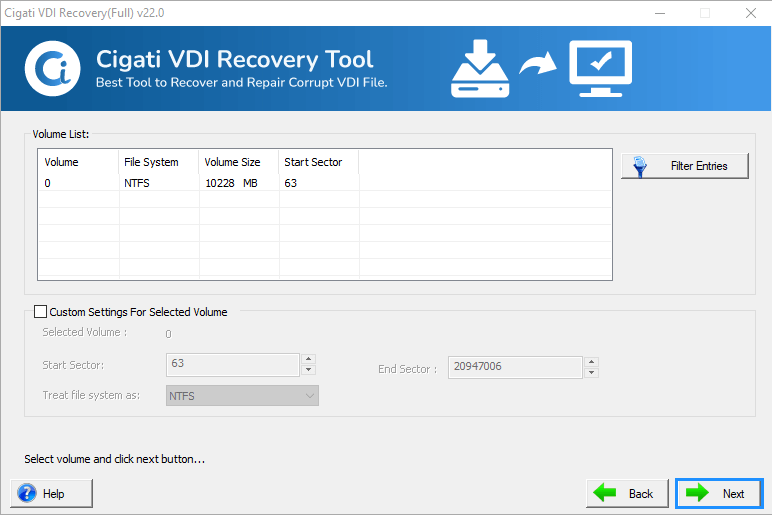
Choose the Custom Volume to repair the VDI data and tap on the Next button. (Note: Compatible with all the file formats like FAT, FAT16, FAT32, FAT64, HSF+, NTFS, RAW)
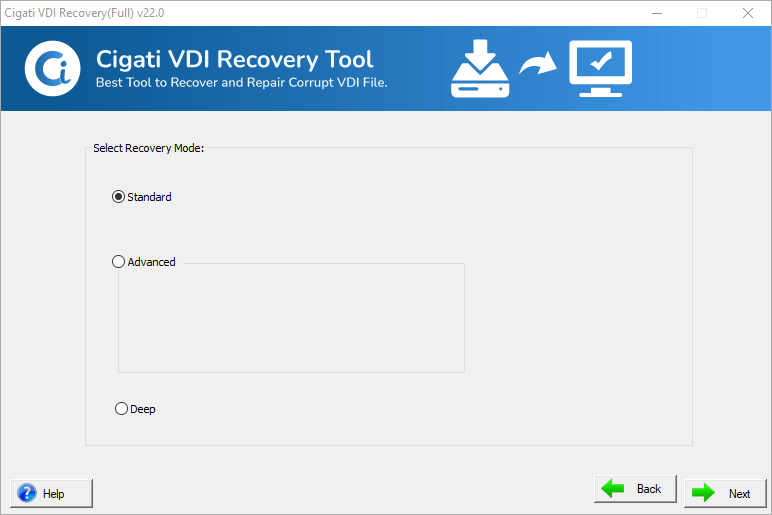
Then, choose the Recovery Mode from the Standard, Advanced, and Deep option.
The process will take time to scan the chosen volume. Click on the Ok button.

After that, check the Preview of the Scanned Files in a tree structure.
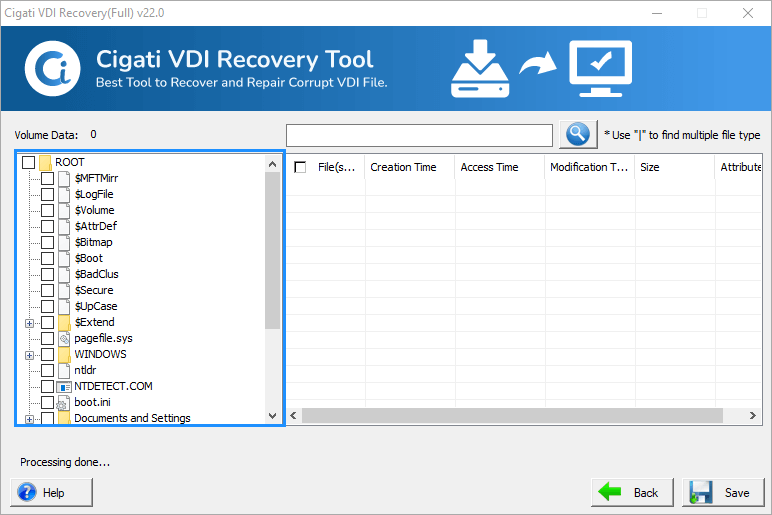
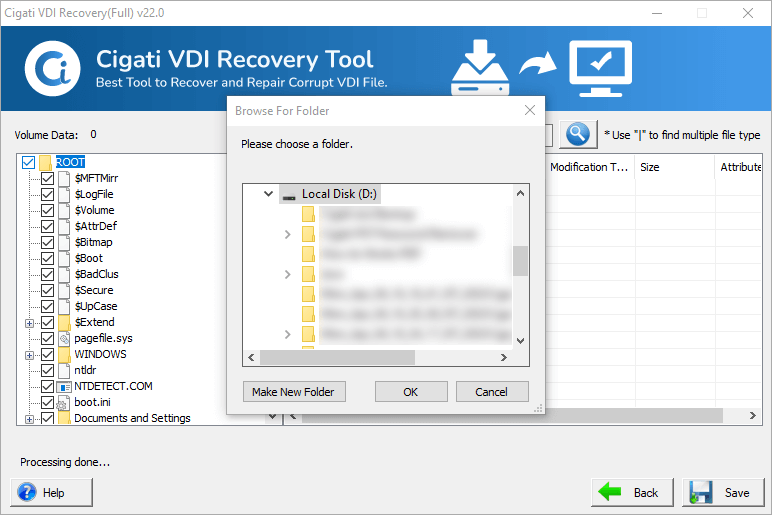
In the end, choose the location to save the recovered VDI files and hit the Ok button.