Google Drive Migration Tool
4.7
The Cigati Google Drive Migration Tool provides a dedicated solution for transferring Google Drive data between Google Workspace accounts. Users can select source and destination accounts, map users, apply migration filters, monitor transfer progress, and review detailed migration reports from a single interface. It also helps maintain folder structures and supports secure authentication during the migration process. Please refer to the Functional & Technical Documentation (FTD) Guide for detailed instructions.
Launch the Software and Open Google Drive Migration
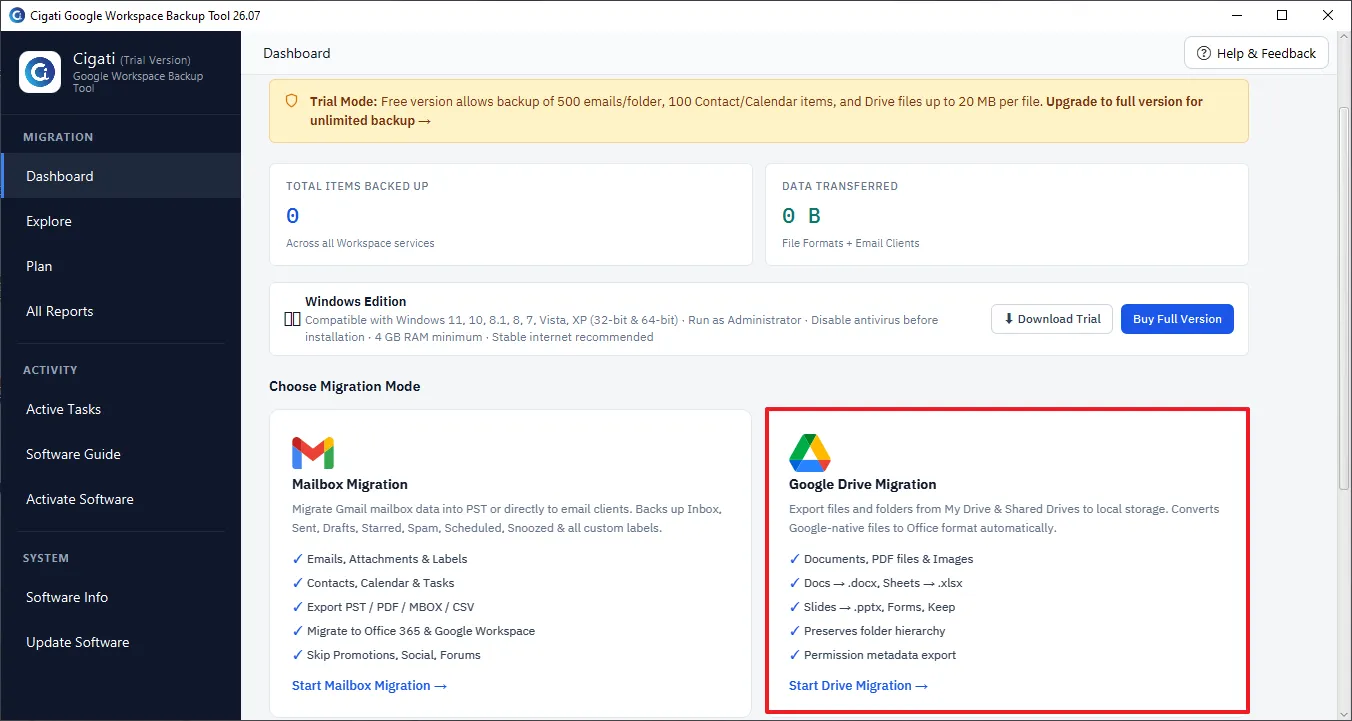
Install and open the software. From the main dashboard, select Google Drive Migration to begin moving files and folders between Google Workspace accounts.
Authenticate the Source Google Workspace
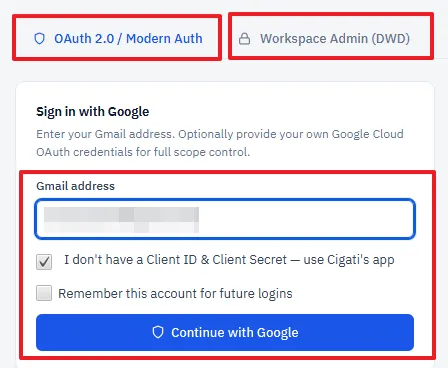
Connect the Google Workspace account that contains the data you want to migrate. The software supports the following authentication options:
Complete the authentication process to establish a connection with the source environment.
Pick the Source Users
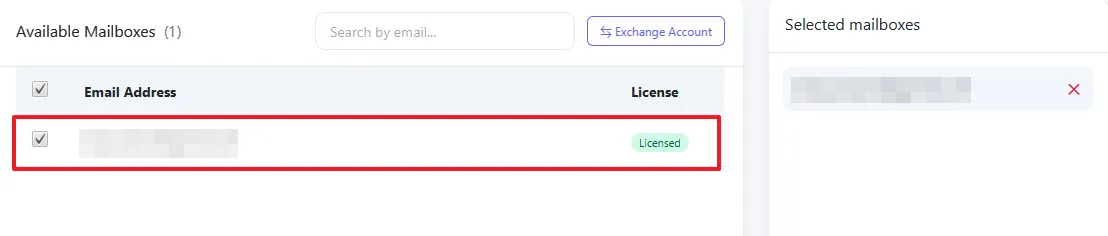
Once authentication is successful, the application loads the users available in the source Google Workspace. Select one or more users whose Google Drive content needs to be transferred, then click Continue.
Set Google Workspace as the Target Platform
When prompted to select the destination, choose Google Workspace (DWD) and proceed by clicking Continue.
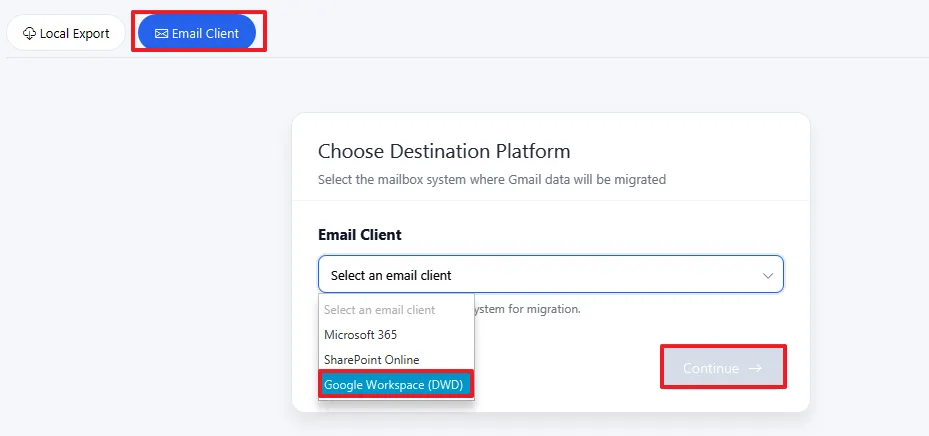
Authenticate the Destination Workspace
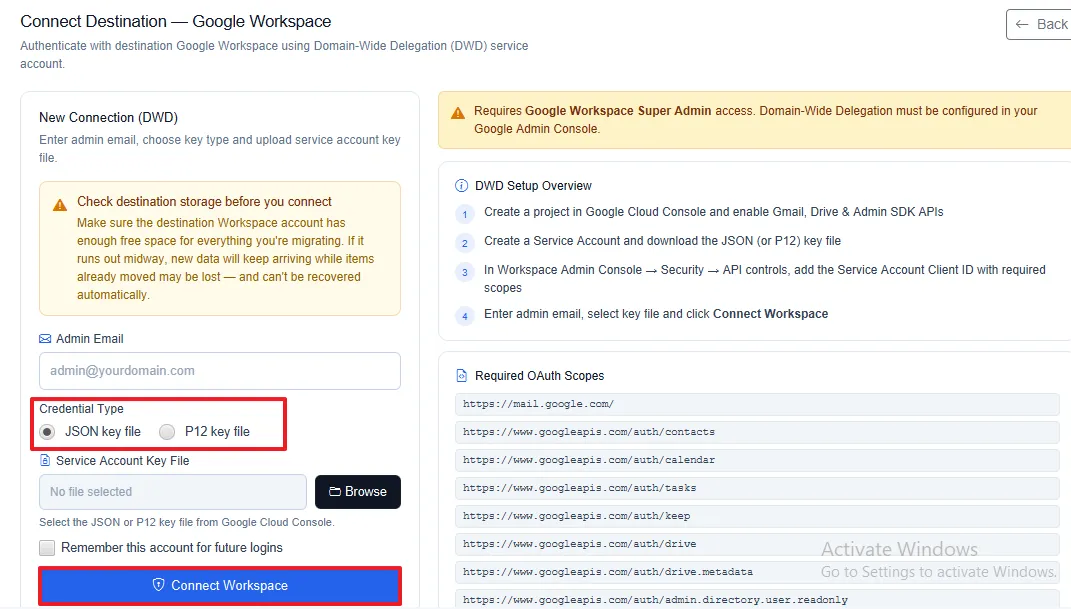
Connect the destination Google Workspace administrator account. Depending on your setup, you can authenticate it using either:
Finish the authentication to access the destination Workspace.
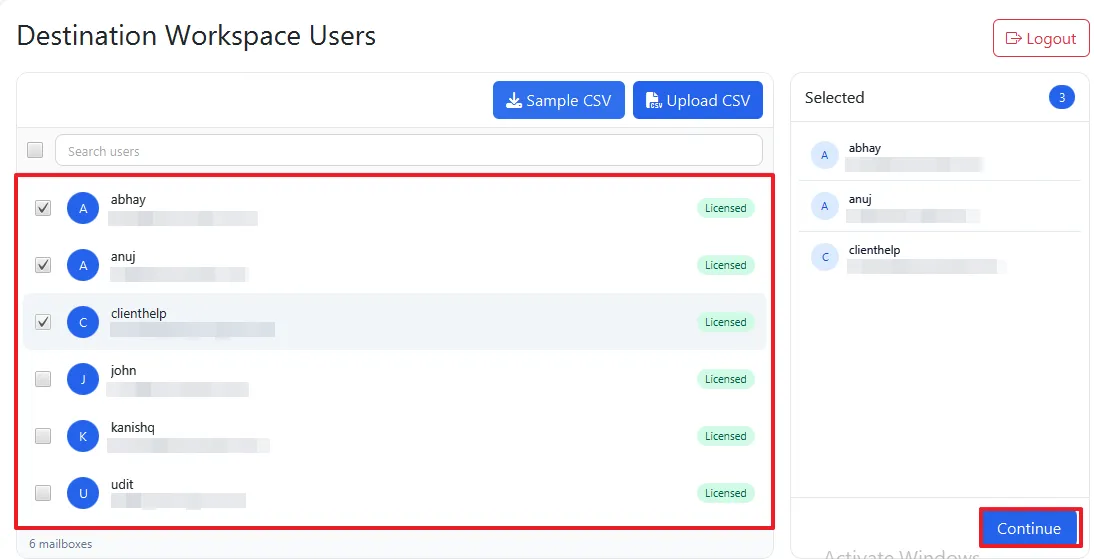
Select Destination Users
The software fetches the user accounts available in the destination Google Workspace tenant. Choose the users who should receive the corresponding Google Drive data.
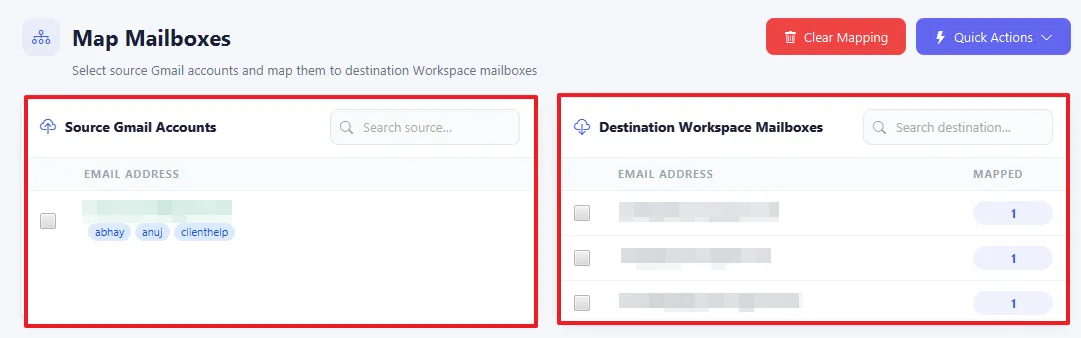
Match Source Users with Destination Users
Create a mapping between the source and destination accounts. Make sure every source user is assigned to the correct destination user, and review the mappings before moving ahead.
Set Resume and Date-Based Migration Options
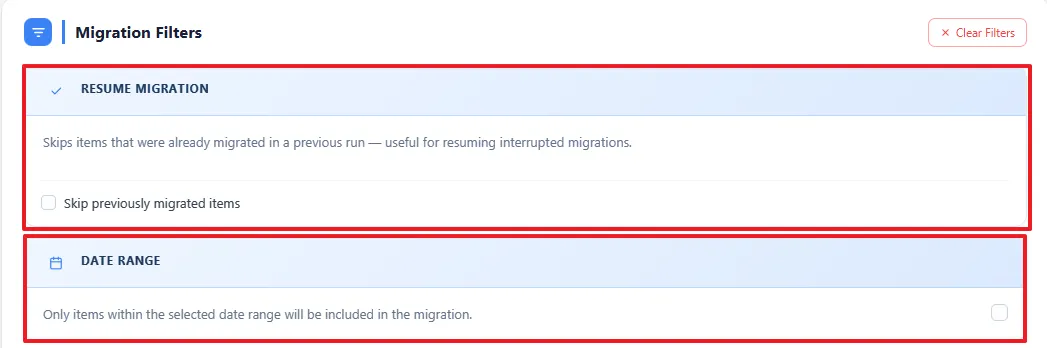
Turn on Resume Migration if you want an interrupted migration to continue from where it stopped without processing completed items again. You can also set a Date Range Filter to transfer files created or modified within a specific period.
Apply File-Level Filters
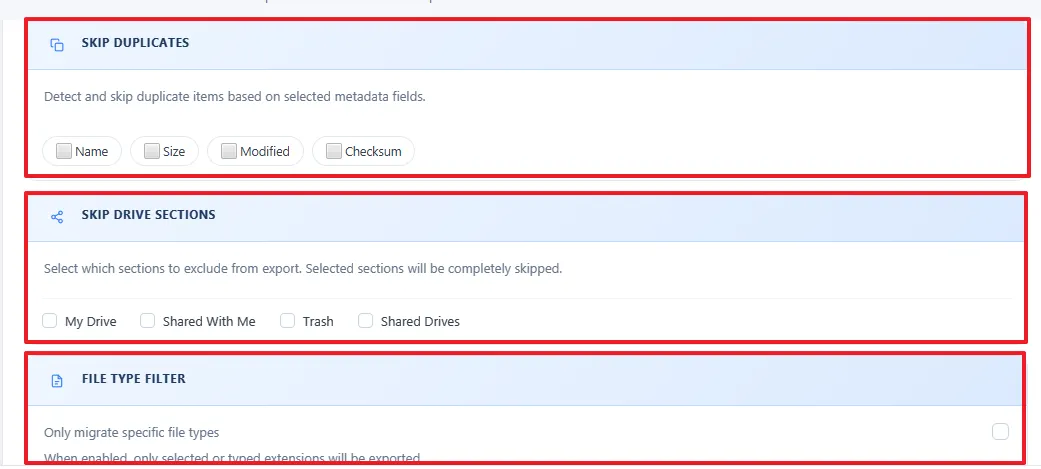
Use the available file filters to control which data is migrated. You can exclude duplicate files, select specific file types, and define minimum or maximum file sizes according to your requirements.
Manage Folder Structure
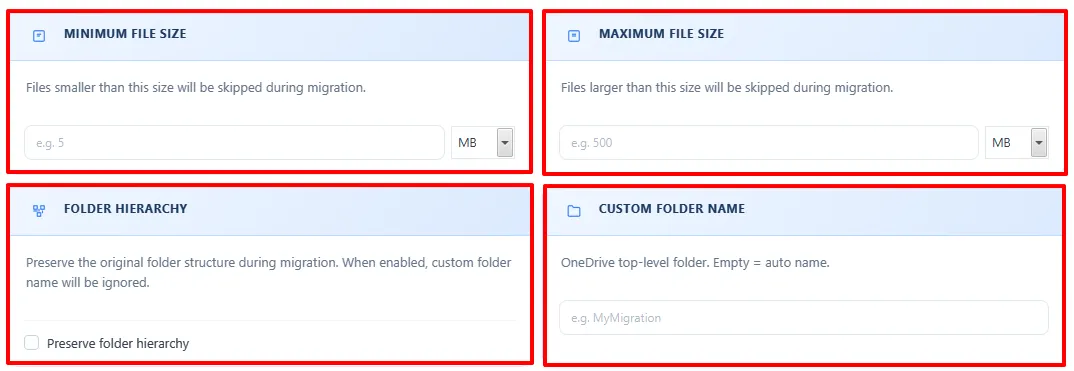
Enable Preserve Folder Hierarchy to retain the existing arrangement of folders and subfolders in the destination. If required, use Custom Folder Name to place the migrated content under a specified folder name. Before starting, verify the selected source and destination users, account mapping, folder settings, and migration filters.
Run the Google Drive Migration
After reviewing the configuration, click Start Migration. The software begins transferring the selected Google Drive files and folders to the destination Google Workspace tenant.

Check the Migration Results
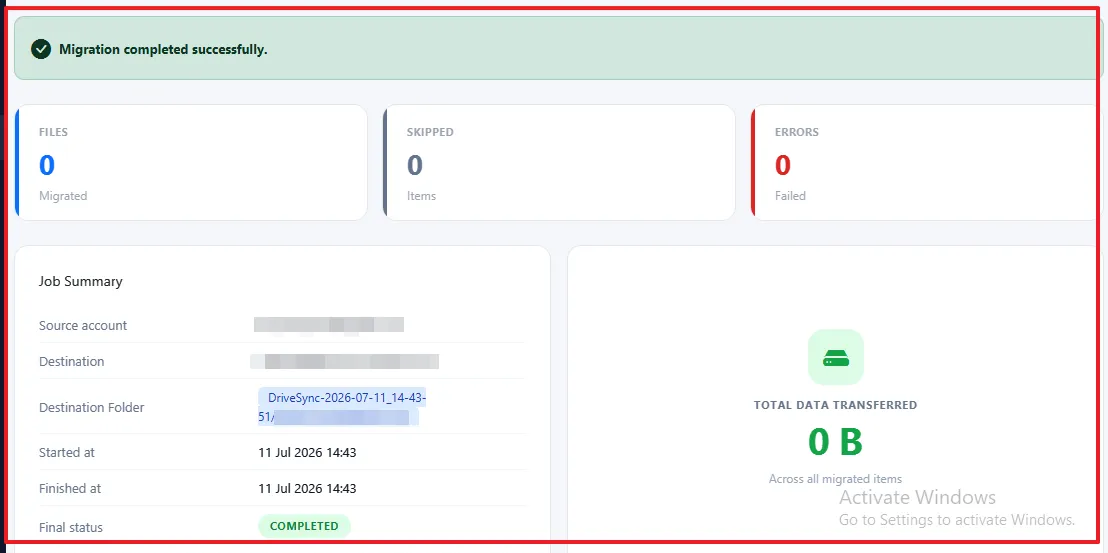
Once the process finishes, open the migration report to check the overall results. The report provides information about successfully migrated files, skipped and failed items, transferred data size, and the current migration status. You can also track migration activities from Active Tasks and access completed jobs through All Reports.