OLM Converter Tool
4.7
The Cigati OLM Converter Tool is designed to convert Outlook for Mac (OLM) files into multiple file formats and migrate mailbox data to various email platforms while maintaining complete data integrity. It preserves the original folder hierarchy, email formatting, attachments, and mailbox metadata throughout the process. Suitable for both home users and IT administrators, the software provides secure, accurate, and efficient OLM conversion and migration for mailboxes of any size.
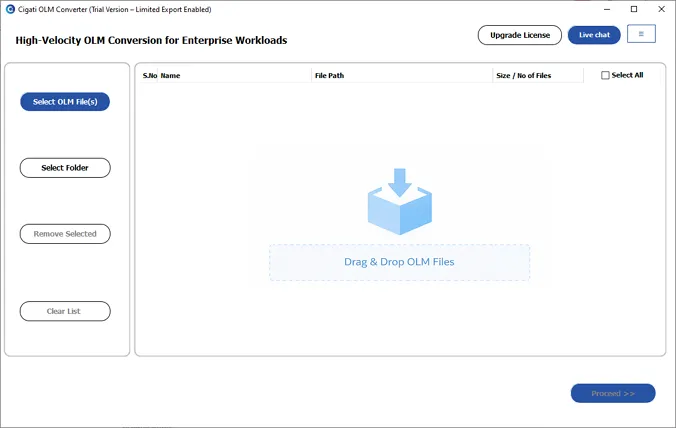
Start the Application
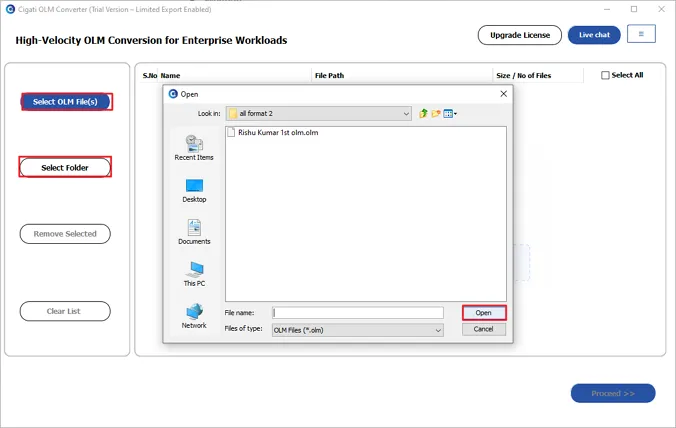
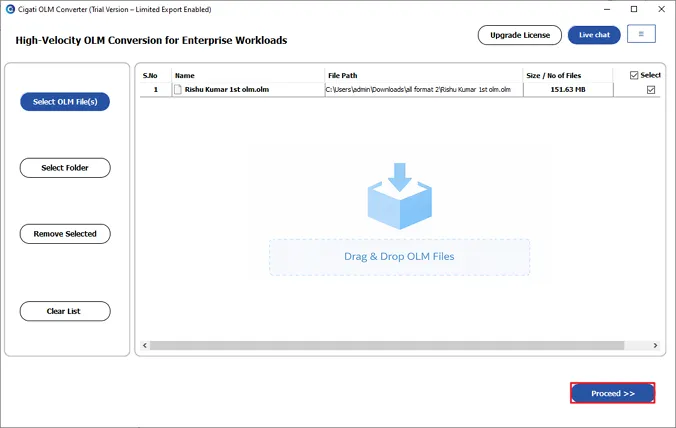
Launch the Cigati OLM Converter and choose Select File(s) or Select Folder to import your Outlook for Mac (OLM) files.
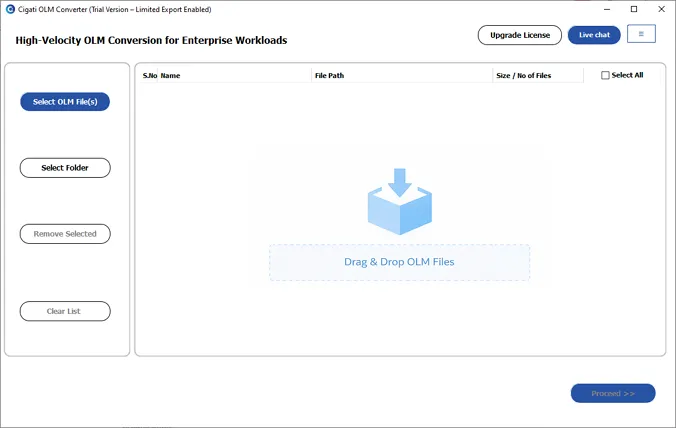
Import OLM Files
Locate the required OLM files on your computer and add one or multiple files to the software for processing.
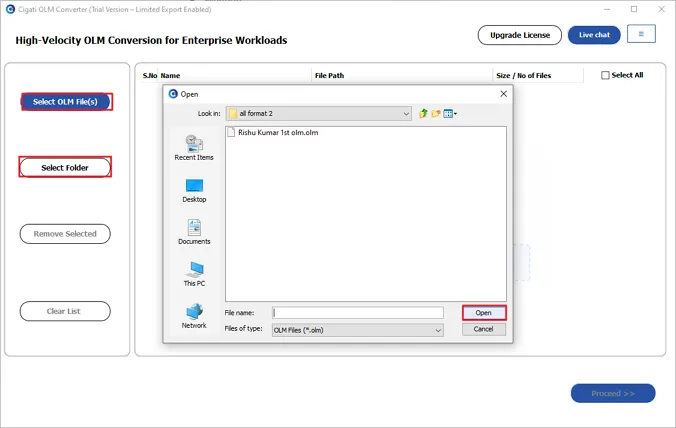
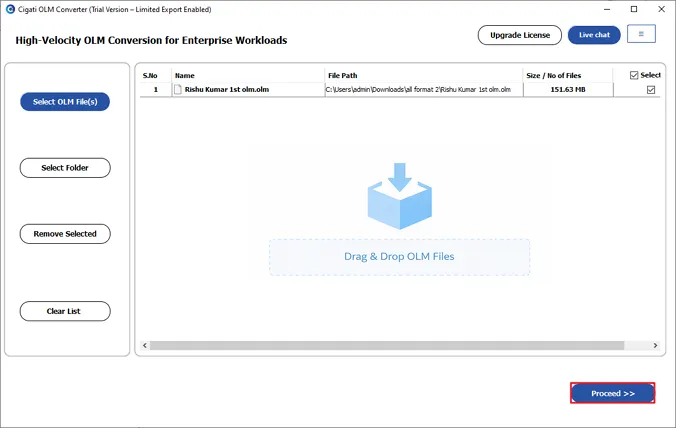
Confirm the Imported Files
Review the imported files, including their names, storage locations, and sizes. Once verified, click Proceed.
Examine Mailbox Content
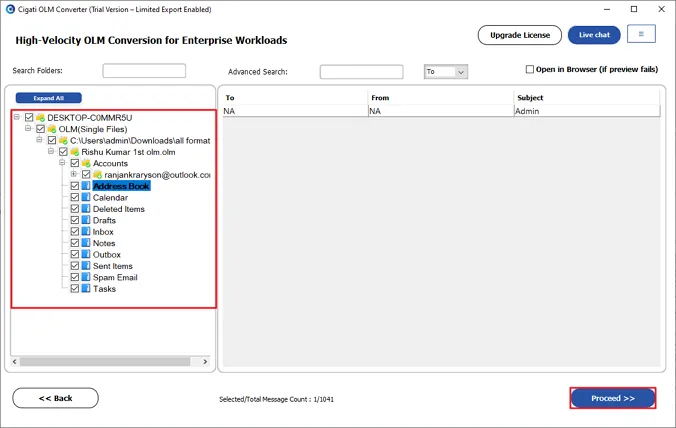
Expand the mailbox folders to browse emails, contacts, calendars, notes, and tasks before starting the export.
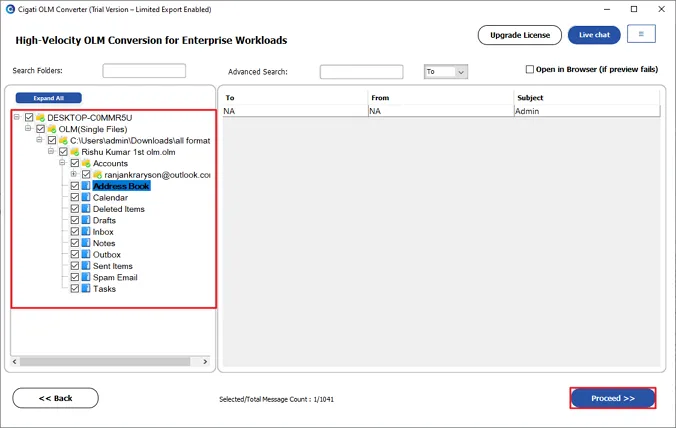
Inspect Individual Mailbox Items
Open any mailbox item to view its contents, including the email body, attachments, headers, calendar entries, contacts, notes, tasks, MIME information, and raw HTML.
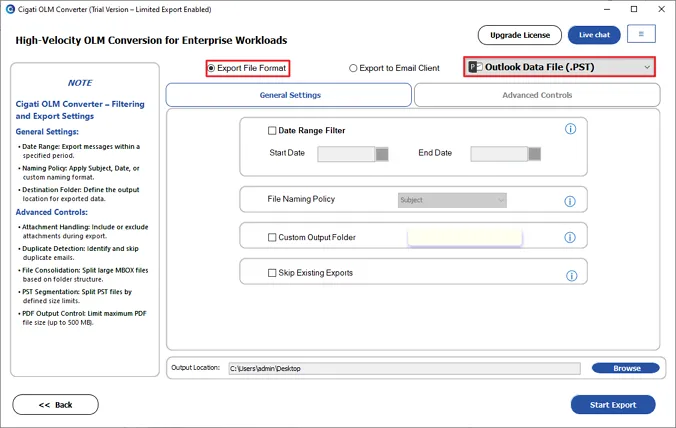
Select the Output Format
Choose Export to File Format and select CSV as the desired output format. It provides PST, PDF, MBOX, EML, MSG, DOCX, PNG, ICS, VCF, & Mozilla Thunderbird.
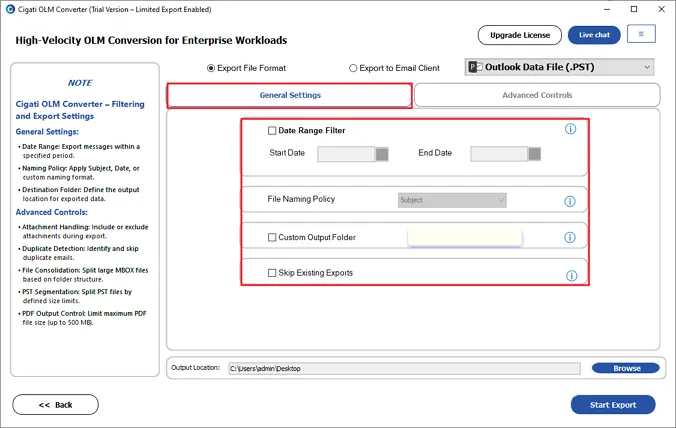
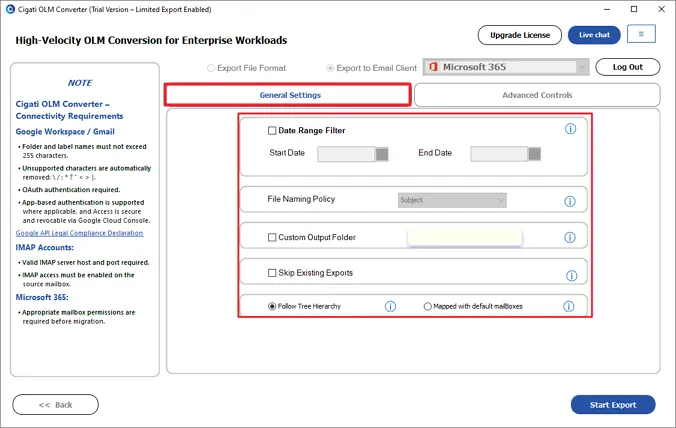
Customize the Export Settings
Adjust the available export preferences according to your requirements.
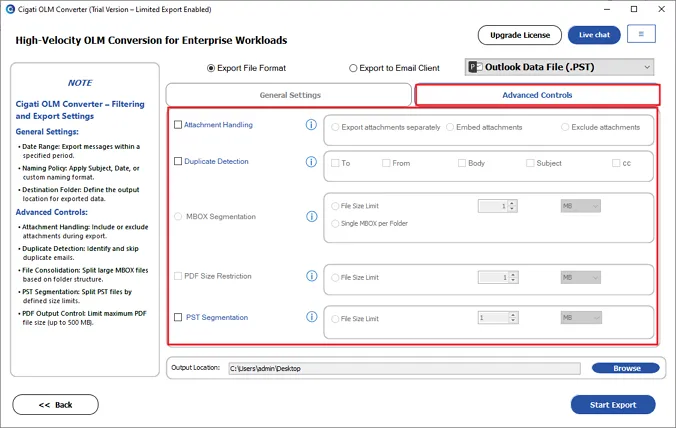
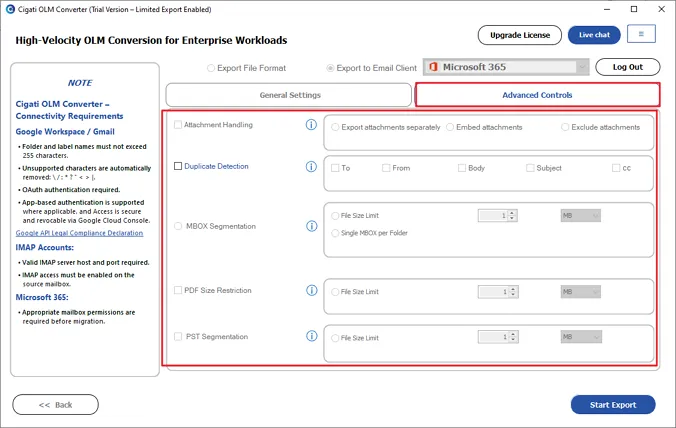
Configure Advanced Options
Apply additional controls to refine the export.
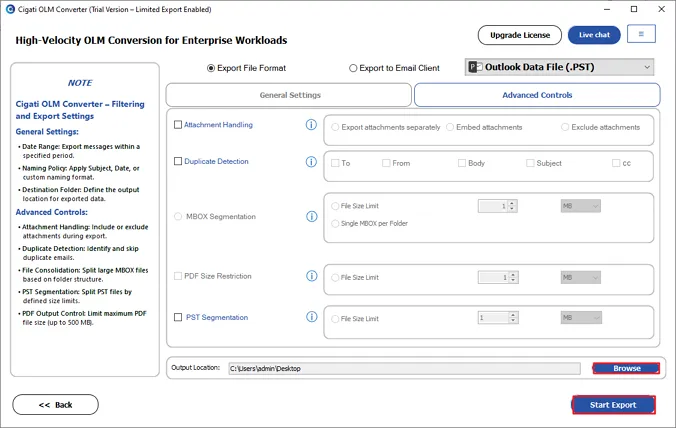
Start the Export
Choose the desired destination folder by clicking Browse, then select Start Export to begin converting the OLM file into CSV format.
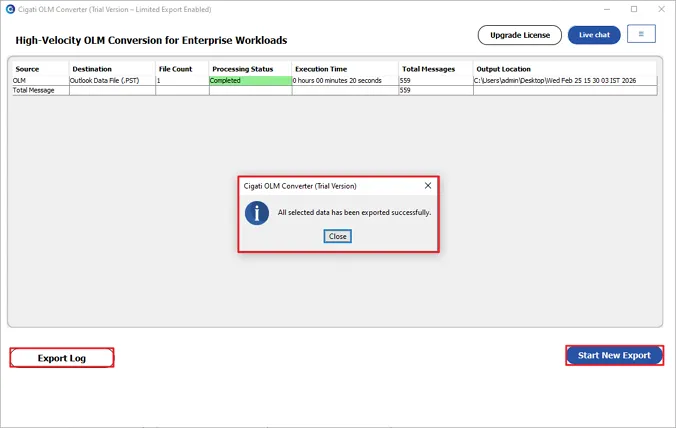
Review the Export Status
Track the conversion progress on the status screen. When the process finishes, open the Export Log to review the results or begin another export if needed.
Select Microsoft 365 as the Destination
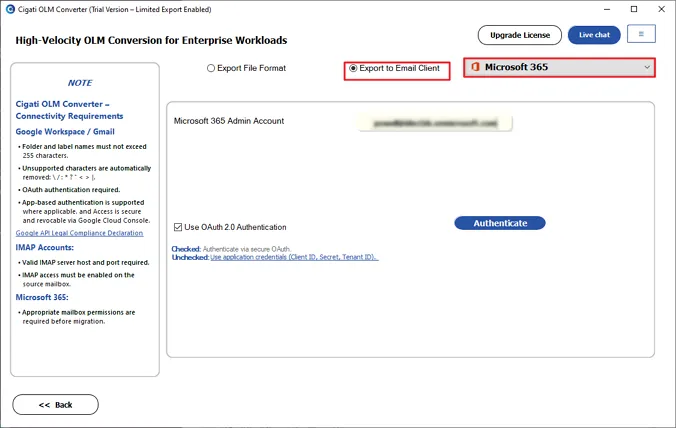
Choose Export to Email Clients and select Microsoft 365 from the list of supported destinations.
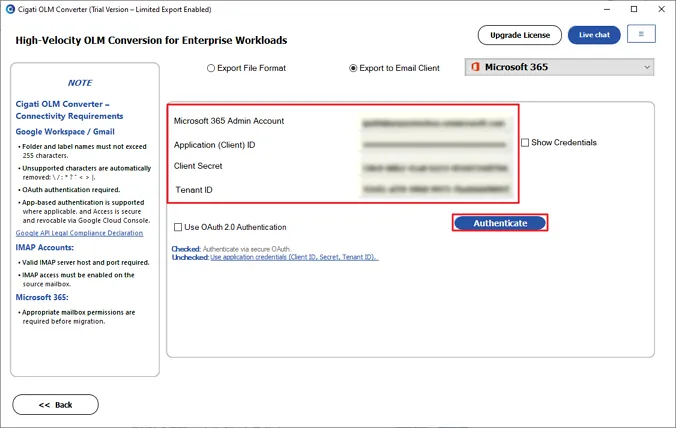
Authenticate Your Microsoft 365 Account
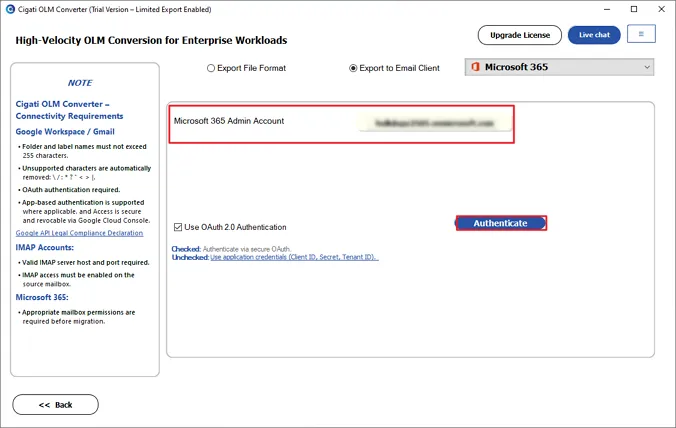
Connect the destination account by signing in through OAuth 2.0 or by entering the required Application Credentials, including the Admin Email, Client ID, Client Secret, and Tenant ID.
Assign Destination Mailboxes
Select the mailbox mapping option that best suits your migration.
Configure Migration Preferences
Modify the migration settings before starting the transfer.
Apply Advanced Migration Settings
Configure additional migration controls as needed.
Begin the Migration
Review the selected configuration, then click Start Export to initiate the OLM to Microsoft 365 migration.
Track the Migration Progress
Monitor the migration in real time through the progress window. After completion, review the Export Log for a detailed summary or start another migration if required.